Nikon Z9 review part 3: Viewfinder Experience
I was quite curious to experience a modern electronic viewfinder (EVF) underwater, and see its pros & cons, in comparison to the optical viewfinders found in DSLRs.
The Z9 offers an OLED EVF of 3.69 M dots, which refreshes 120 times per second (120 Hz).
We will go through the following:
- Viewfinder configurations
- How different it feels, from an optical viewfinder
- Mission control
- Image review
- The FX/DX switch
- Viewfinder wrap-up
Viewfinder options
I have configured the EVF to be unaffected by exposure parameters (“ease of viewing” mode, custom setting d9), which is the closest thing to the DSLR experience, and best suited for strobes use. When working with continuous light sources only, switch to “preview exposure” for a “what you see is what you get” experience, where the frame becomes darker/brighter as you tweak exposure parameters, and you can overlay a histogram too.
You can also adjust the size of the EVF display, which I found handy, because that screen is larger than any optical viewfinder I ever used. Underwater, I found the Nauticam 40 degrees/0.8:1 angled viewfinder was able to display the viewfinder in full, but I had to cautiously line-up my eye, sticking my mask up-close to see the whole thing. I chose to use the “small” EVF size, which is still plenty, because it made it quicker to see and compose my photos, even if I didn’t fully stick my mask on the Nauticam 45 degrees viewfinder.

The Nauticam 40 degrees/0.8:1 angled viewfinder, mounted on the Nauticam Z9 housing. It is designed specifically for the larger EVFs of mirrorless cameras.
Also, I have disabled the automated switch between the EVF and the rear LCD screen, as I found my eye wasn’t reliably detected, with the camera in the housing.
Finally, the Z9’s EVF is pretty bright and I found that a -3 brightness adjustment worked well for most of my daytime shooting, whereas at night I will go down to “Low 1”.
How different does it feel, from an optical viewfinder?
When working with abundant ambient light and as long as I wasn’t framing into the sun, the EVF felt pretty close to an optical viewfinder. I think this has to do with the ample screen resolution (3.69 M dots) and especially the high 120 Hz refresh rate: the screen updates 120 times per second. Importantly: neither the resolution nor the refresh rate seem to drop as the camera focuses or shoots, which also helps keeping the experience “real”.
Easier to see in low-light
I started noticing the EVF in darker conditions, when it was dark enough that I would have struggled to find the subject, through my DSLR’s viewfinder. In those conditions, the EVF would automatically brightens the scene (remember, “ease of viewing” mode), making it easier to frame photos, with subjects hiding in crevices or below a rocky ledge. Again, this helped do without a focus light, an advantage for shy subjects.
Viewing highly contrasted scenes
The other situation where the EVF becomes noticeable is wide-angle photography, when framing scenes with a high contrast. After all, any digital screen has a finite dynamic range, and will struggle to render details in both highlights and shadows, when presented highly contrasted scenes. This is a known limitation of EVFs that has kept many DSLRs users on the fence, so let me illustrate the 4 experiments I made around contrast handling.
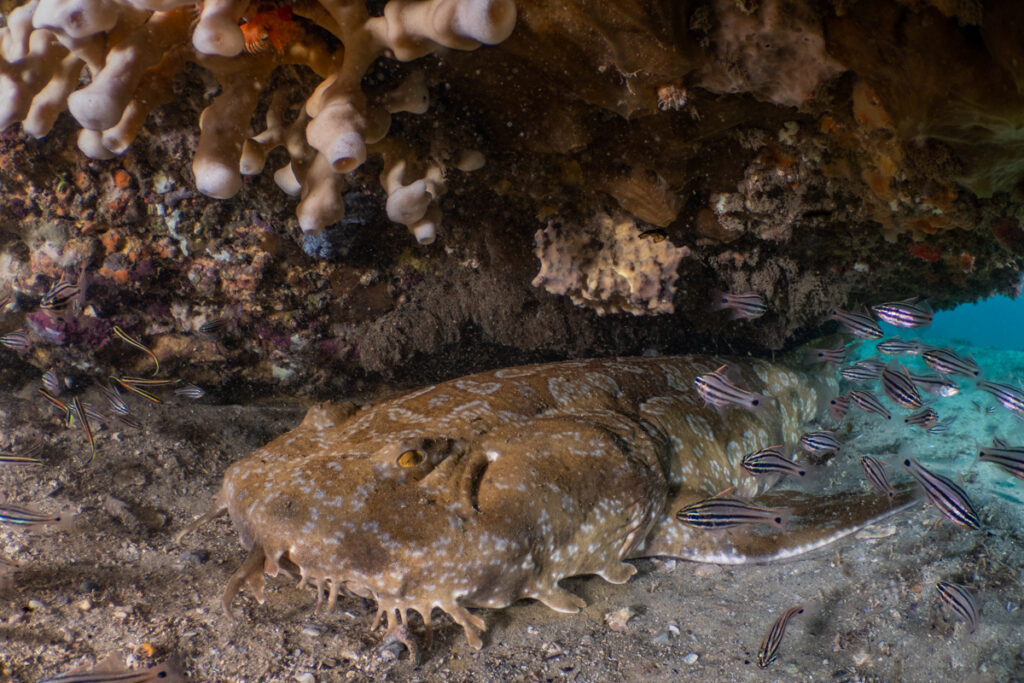
Experiment 1: it was dark under this rocky ledge, where the Z9 chose to brighten up the shadows, letting me see clearly the wobbegong shark. The blue water in the background was blown-out (white), but I could still see the cardinalfish as the swam into that area.

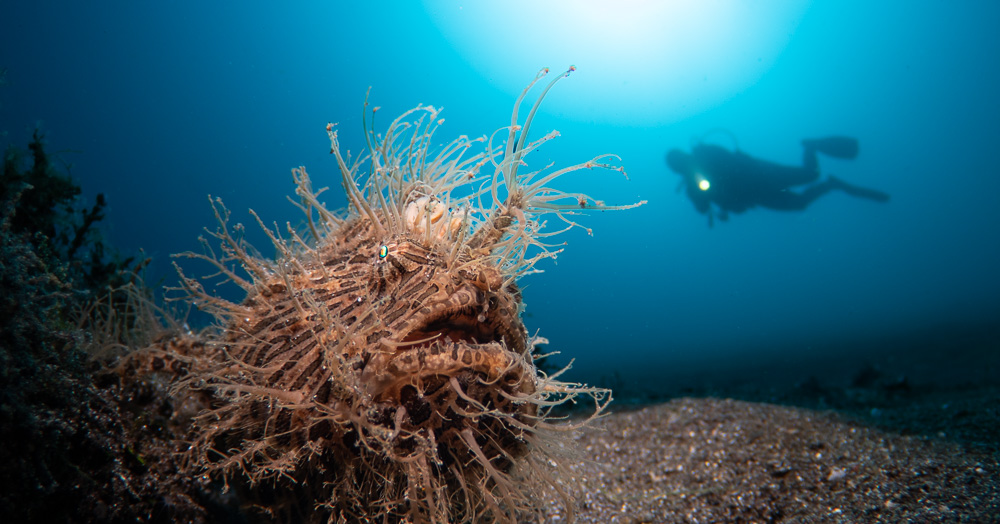
Experiment 2: high contrasts at the shallow exit of the 120 meters long Fish Rock cave (8 meters depth). With my focus light turned-off, through the EVF I could see the turtle and rocks in the foreground (amplified), but the exit was blown out. I could see fish swimming in the middleground, but the schools at the background were hard to tell apart.

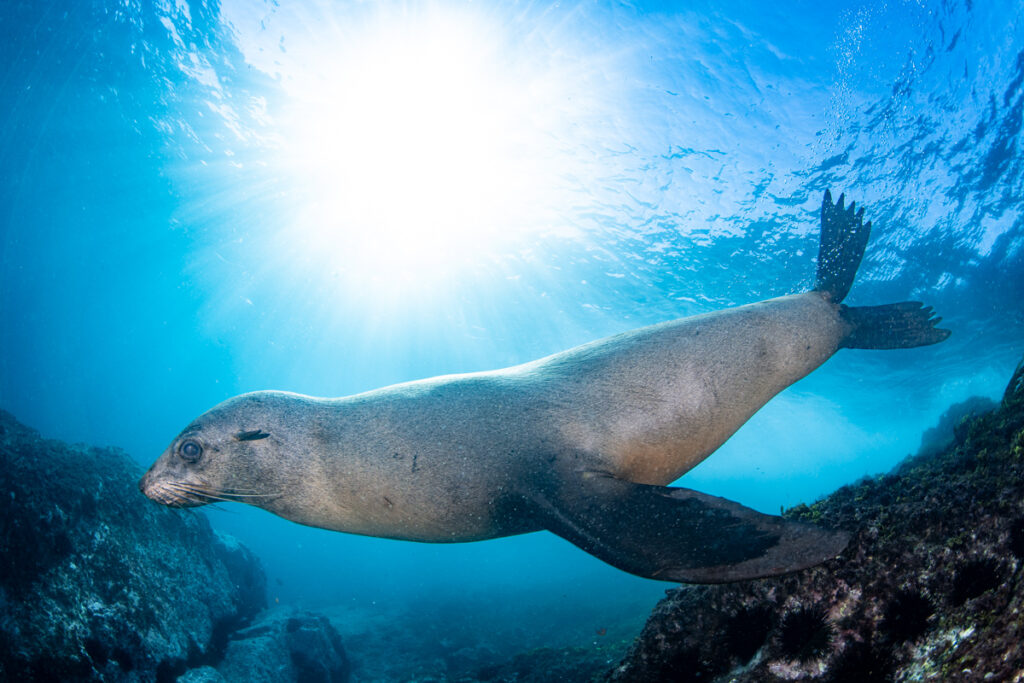
Experiment 3: shooting towards the sunball at depth (27 meters), with 15 to 20 meters visibility, this was a more manageable level of contrast for the EVF. I could still see details of the schooling fish (they appeared dark but not fully black), and in the background, only the area around the sun-ball was blow-out.
Experiment 4: in 1h40 minutes of exhilarating fast seals action off Montague Island (NSW, Australia), I shot 1300 images in the shallows, at maximum 5 meters depth. The sun was shining bright, the water was decently clear (12-15 meters visibility). I followed the seals, shooting with either the sun on my back or in front of me. I also shot a lot the swell window, as seals were sunbathing at the surface.
Unfortunately, all the notes I took from the seal dive were about autofocus performance and burst shooting (more on that later), and I simply can’t remember how the water background looked in the EVF. All I recall is having no issue seeing and following distant seals in the EVF, as they made their way towards me.
Reflecting as I am tying these lines, all that tells me is the Z9’s viewfinder ability to handle contrast is sufficient to me, as it didn’t stop me from getting a shot.
During night dives
When I spot a subject during a night dive, I depress the shutter release to wake-up the EVF, then aim the macro lens towards the subject, then look into the EVF to compose the shot. On several occasions, I noticed it takes a moment for the viewfinder to adjust its brightness. At first I can only see is a very bright display, then the details appear.
Even when the EVF has “settled down”, the contrast and details aren’t as good as what I am used to with the D500 and D810 DSLRs, making it harder to locate the subject, under a red focus light.
Mission control
With my Nikon DSLRs, I regularly have to “wake up” the camera so that it overlays my exposure parameters, on the optical viewfinder. As I change subjects, sometimes I also press the “info” button to quickly remind myself of all the settings I was using (exposure parameters, flash mode, autofocus mode, burst shooting speed, etc).
All of this is much simplified on the Z9: all the settings I possibly want to know about are laid-out in two rows in the EVF, above and below the subject. This allowed me to keep track of subject movements while checking those important parameters.
Image review
One great advantage of a mirrorless camera is the ability to review photos without taking your eye away from the viewfinder.
This allowed me to work faster, making the most of any short-lived photo opportunity.

It took a while to line-up everything for that shot, including crawling in between two rocks, to reach the angle I was after. I was glad I could check my lighting and exposure without having to swim back.
The only circumstances where I prefer to review photos on the rear LCD screen is when there is a lot of action, or when it’s important to maintain situational awareness. It’s far too easy to forget the outer world when sticking to the EVF both for shooting and reviewing photos. With the fur seals, I missed some good photo opportunities because I was looking at the EVF, obnoxious about the seal pup which was looking at its reflection, on my dome port…
Last but not least, during all my review I kept the photo display “on demand” (a left-thumb lever, on the Nauticam Z9 housing), and I am thankful to Yazid Shaari, experienced Z9 user and fellow member of The Underwater Club for a hot tip: turn-on auto picture review. That setting felt wrong when I saw it in the menus, but it turns out this speeds-up the workflow even more, without meaningful downsides. Indeed, when you take a series of shots tracking a subject, as long as you keep the shutter depressed, there will not be any photo displayed. It’s only releasing the shutter that photos will come-up in the viewfinder, and if you decide it’s not the right time, simply press the shutter and they go away. With this trick, I was able to operate the NA-Z9 housing single-handed more often, while enjoying timely color & exposure feedback.
The FX/DX switch
As a long-term DX shooter, I knew I would miss the Tokina 10-17mm, a zoom-through fisheye which offers a useful range of 180 to 100 degrees, in diagonal field of view. I felt it when the fur seals were a little too shy to fill the frame with my 180 degrees fisheye.
Well, that’s when I learnt to appreciate the option to switch from FX (full frame) to DX (APS-C format). Obviously this goes with a loss of resolution, where the image captured weighs 19 MP instead of the 46 MP produced in FX mode, but this is very close to the 21 MP images of my Nikon D500, which I know are sufficient for most of my needs. Besides, the EVF automatically adjust to display the exact field-of-view that will be captured, so I am in full control of my composition, while still enjoying the Z9’s comfortable viewfinder, and a near 100% coverage of the frame, with autofocus points.
I realized I much preferred to shoot this way, whenever I saw that I lacked magnification in macro, or that my wide-angle subject was too shy for a 180 degrees fisheye. In this mode, the Z9 will produce a 19 MP raw file, which saves on storage and is good for competitions which look down on cropping.
On my Nauticam NA-Z9 housing, I have allocated the DX/FX switch to the Fn3 button, conveniently accessed by a lever near my left little finger, and this way I could “zoom out” of DX mode in a blink, when I saw a curious seal coming close enough.
Wrap-up: viewfinder experience
All-in-one, I prefer the Z9 viewfinder experience over that of high-end DSLRs. I can work faster with this viewfinder, I can see better those subjects hiding in the dark, and I can review photos immediately, in situations where I would have had to step back with my DSLR. Also, I love being able to toggle between FX and DX modes, whenever the need for a longer focal length arises. The only situation where I prefer composing a photo with a DSLR is at night, when using a red focus light.
Z9 review index:
- Part 1: Prelude and Introduction
- Part 2: Autofocus performance
- Part 3: Viewfinder experience (this post)
- Part 4: Battery life, Burst shooting, Max Synchro Speed and Image quality
- Part 5: The Nauticam NA-Z9 housing
- Part 6: Conclusion


Comments