Review: Angled Relay Lens For The Nauticam EMWL

Review Index:
- Prelude
- The problem being solved
- The solution
- Subject on the sand
- Subject above the bottom
- Do you still need an external viewfinder?
- When the standard relay is better
- The feature I missed
- Wrap-up
- About the author
Prelude
If you have read my review of the Nauticam EMWL, you know I am a big fan of this underwater “bug-eye” system, for it enables the most extreme, eye-catching sort of CFWA (Close-Focus Wide-Angle) imagery. A fisheye lens – mounted behind a mini-dome – has long been the go-to setup for CFWA, but the EMWL offers higher magnification ratios and the ability to get much closer to critters, due to its pointy & tiny front optics. In short, the EMWL produces the unique perspective you’d have if you & your fisheye setup shrank by 5 times! This is why you hear EMWL users say they are “re-discovering” their favorite dive sites, when using that system.
A couple of years after the EMWL came out, Nauticam announced an accessory which picked my curiosity: an angled relay lens, which can be used as a replacement for the original straight 150mm/6in relay. At first I couldn’t quite grasp the reasoning behind this new product: in two years of shooting the EMWL, I didn’t see why I wouldn’t want to use the straight relay, what was the problem being solved?
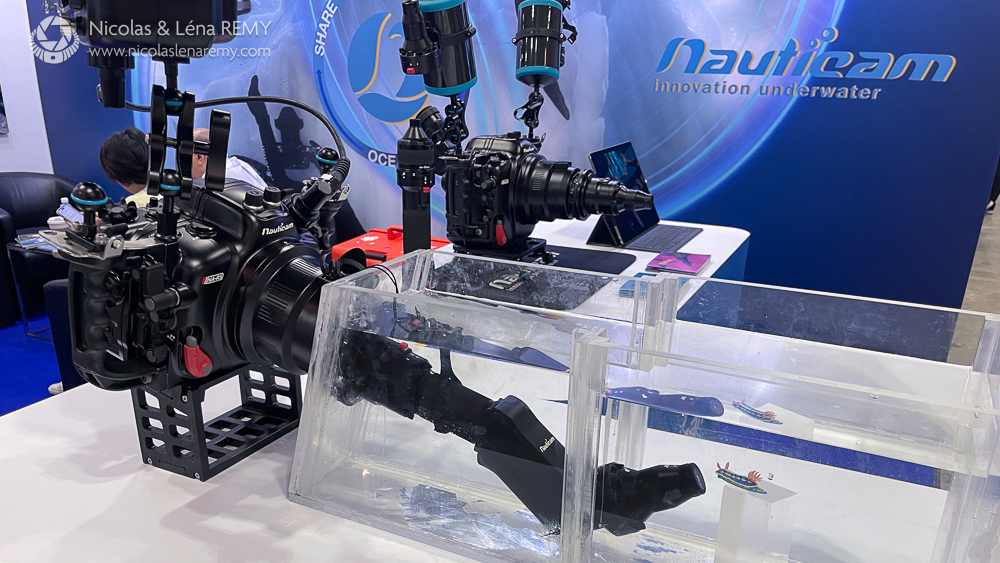
I parked that thought until I visited the Nauticam booth at ADEX Singapore a few months ago, where Peter Mooney (Nauticam Australia) showed me around the latest innovations. The use-case for that particular product? Frame your subject against a blue water background… even when it’s crawling on the sand!
That’s it I was hooked, and I want to thank Nauticam for providing me with an angled relay, for the purpose of experimenting and writing this review. The timing worked really well: I received the lens just before flying to North Sulawesi, for 6 days of diving at Lembeh Resort, followed by a few days at Murex Manado and Murex Bangka resorts.(P.S: there are 2 spots left for my Lembeh workshop in January 2024, due to last minute cancellations)
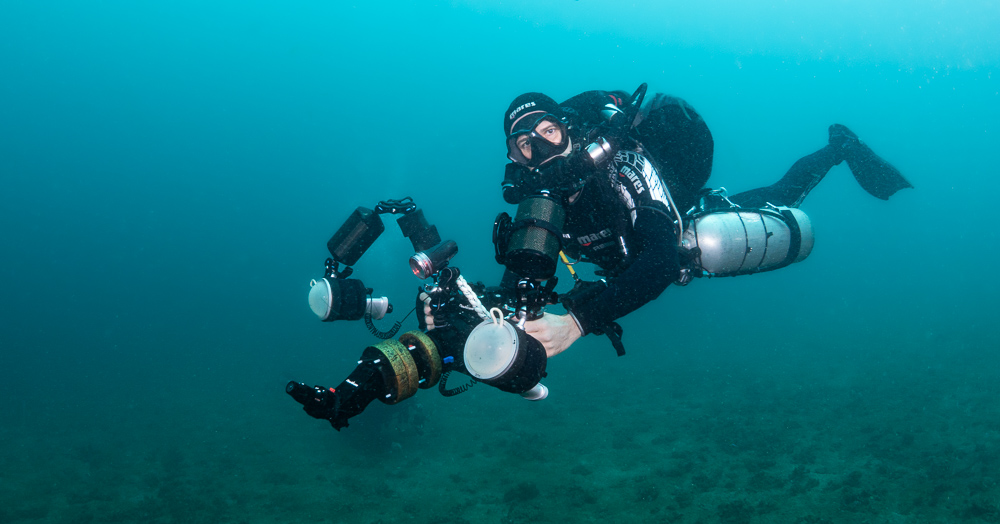
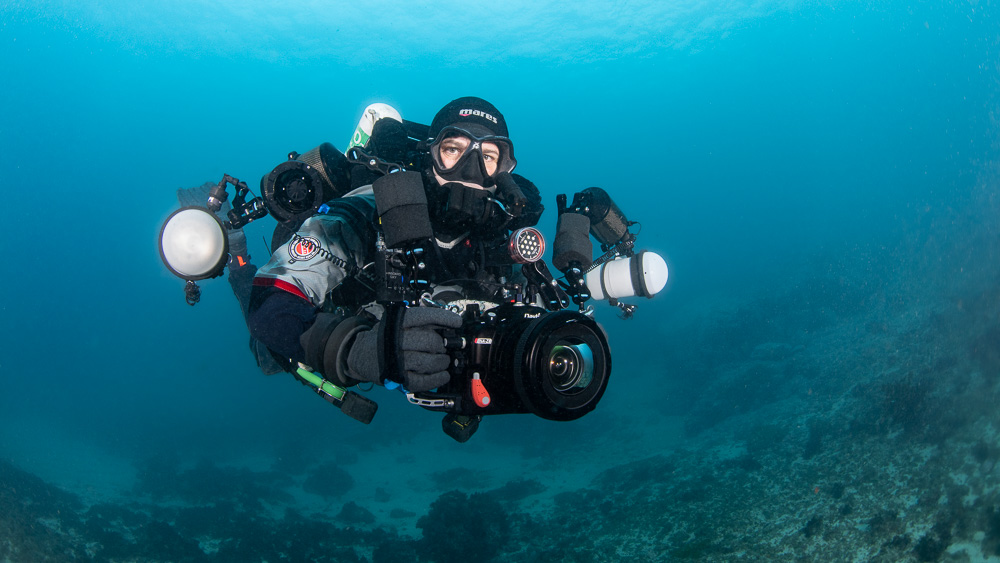
Photo credit: Jacob Guy.
The problem being solved
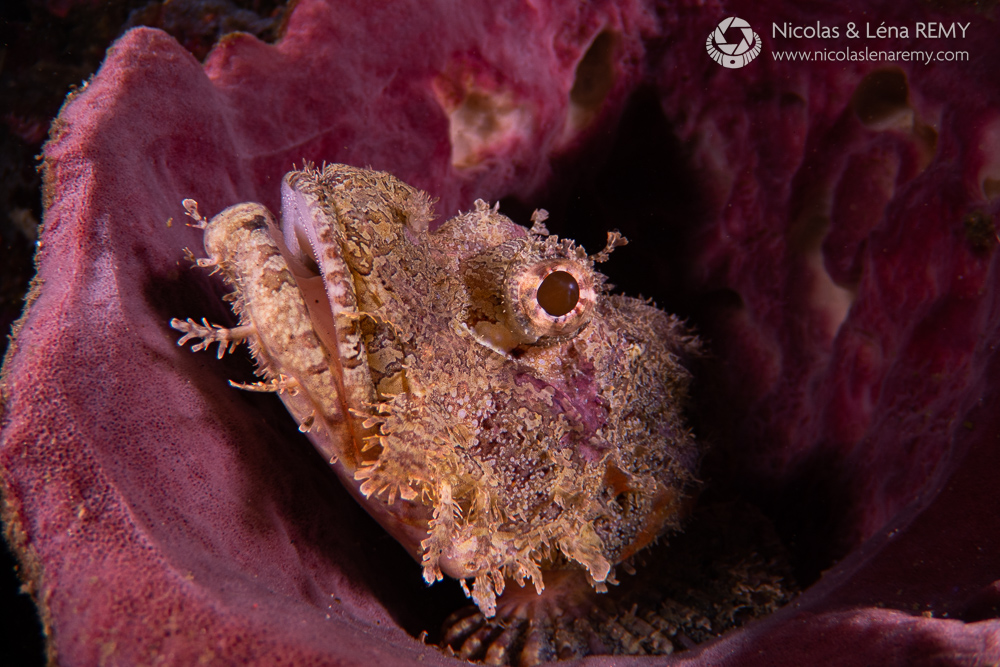
It became obvious when Peter articulated it: although the assembled EMWL system is quite thin, since it is centered on your camera’s optical axis, you’re bound to shoot at a slightly downwards angle if your subject is on the sand. Same goes when using a mini-dome and it’s simply a fact we’ve learnt to accept: you can get some blue water in the photo, but the critter is going to have sand/muck behind it. So it goes.

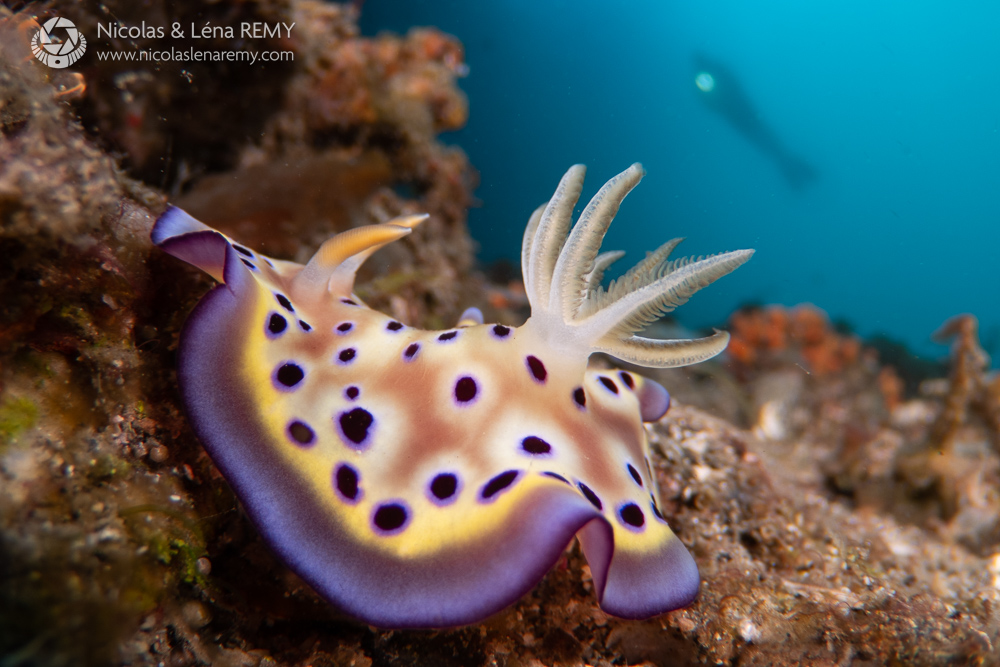
Left: Nikon D810, Nikon F 105mm, Nauticam EMWL 100°, 1/50, F/18, ISO 640.
Right: Nikon Z9, Modified Nikon Z 105mm, Nauticam EMWL 160°, 1/160, F/18, ISO 800.
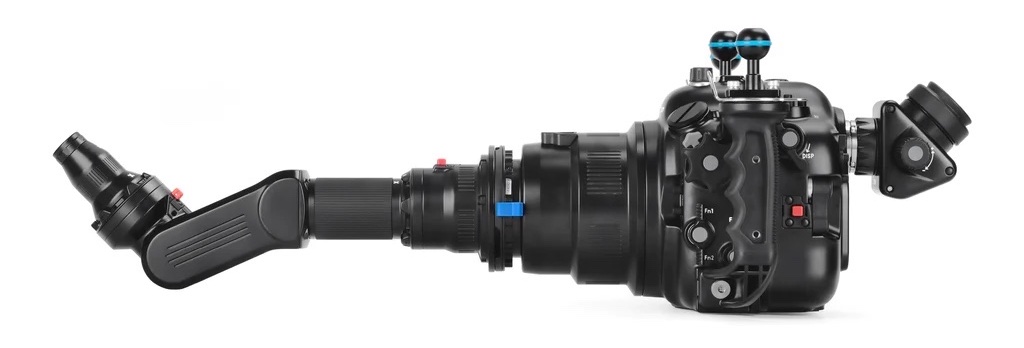
The solution
Enter the angled relay lens, another Nauticam engineering feat which turns a straight optical system into a bent one with two “turns”, resulting in an upwards 45° angle, over the optical axis.
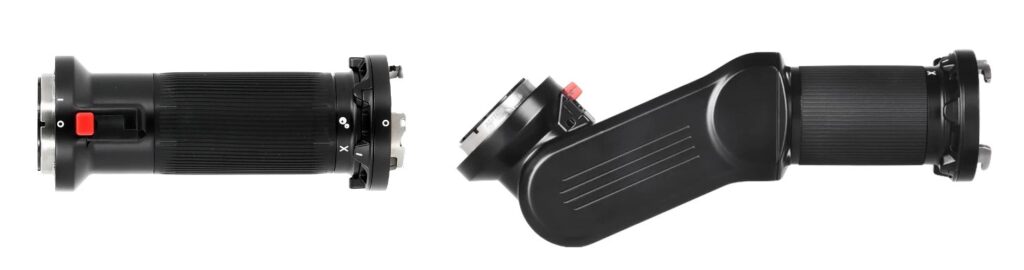
As part of my introduction to underwater photography course (now available as a gift), beginners learn that wide-angle photos generally look better when framed upwards. This produces a more flattering perspective with most subjects and including a water background contributes to the story-telling, especially when the surface is visible.
Well, the angled relay enables just that, while shooting small critters on the sand, with a bugeye twist!
Field observations
When I first started shooting the EMWL system, it took me a couple dives to get fully acquainted. Moving to the angled relay lens required some adjustment too, though not as much.
Subject on the sand
Indeed, I found myself hovering over the sandy bottom of the Lembeh Strait, aiming down the EMWL system, so that the pointy end (the 160° objective lens) would lie nearly flat in front of the subject, with a slightly upwards angle. Holding a muck stick with my left hand helped steadying myself up and this was the only contact I had with the seafloor. Shooting this way creates challenges with motion blur (the EMWL cuts down a lot of light), which saw me using higher ISO settings to increase my shutter speed. Also, the angled relay is around 170g/0.37lb more negative than the 150mm relay, so be prepared to add extra floats.
Yet, from the first dive with the new relay I took images that I really liked, which would have been impossible to produce with any other equipment. As a bonus, framing subject with the housing away from the bottom meant that size didn’t matter anymore! One short-coming of using a full-sized pro camera like my Nikon Z9 is that I can’t get as low when shooting subjects on the sand, but this becomes a non-issue with the angled relay.


Subject above the bottom
Besides animals on sand, the angled relay is beneficial for the many scenarios where a subject is swimming over the bottom, or positioned low on a reef. With the standard relay, the EMWL protrudes as far as 39cm/11in in front of the housing, making it difficult or impossible to aim with that upward angle. The angled relay solves that problem and is much easier to use in such a scenario, where you play around with the system’s 45° angle. Indeed, you can point the housing slightly down, say at a 15° downwards angle, and the front lens still has a comfortable 30° upwards angle (45° minus 15°).

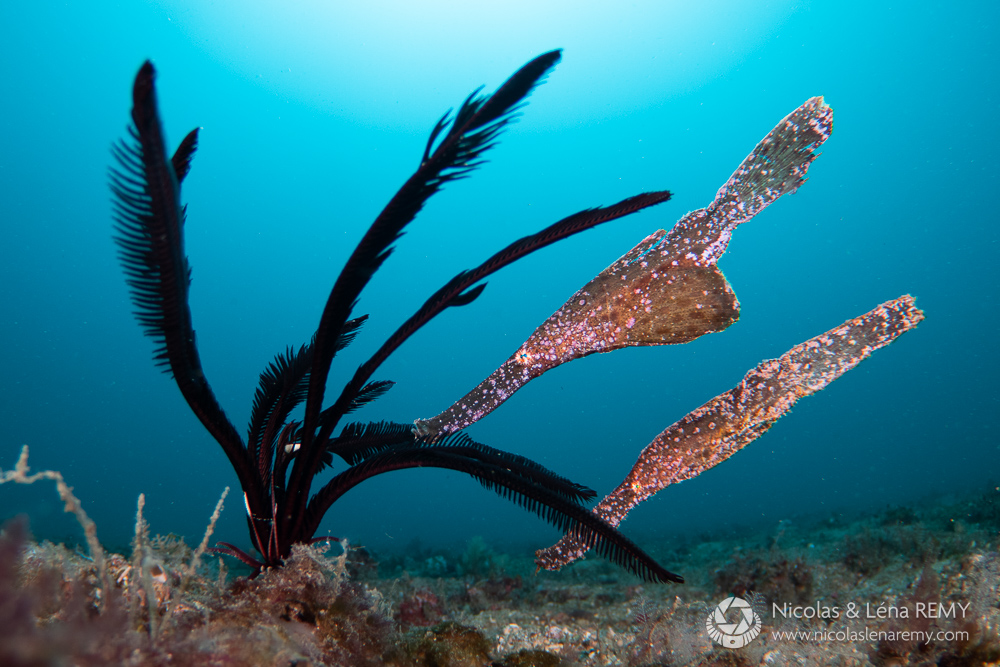
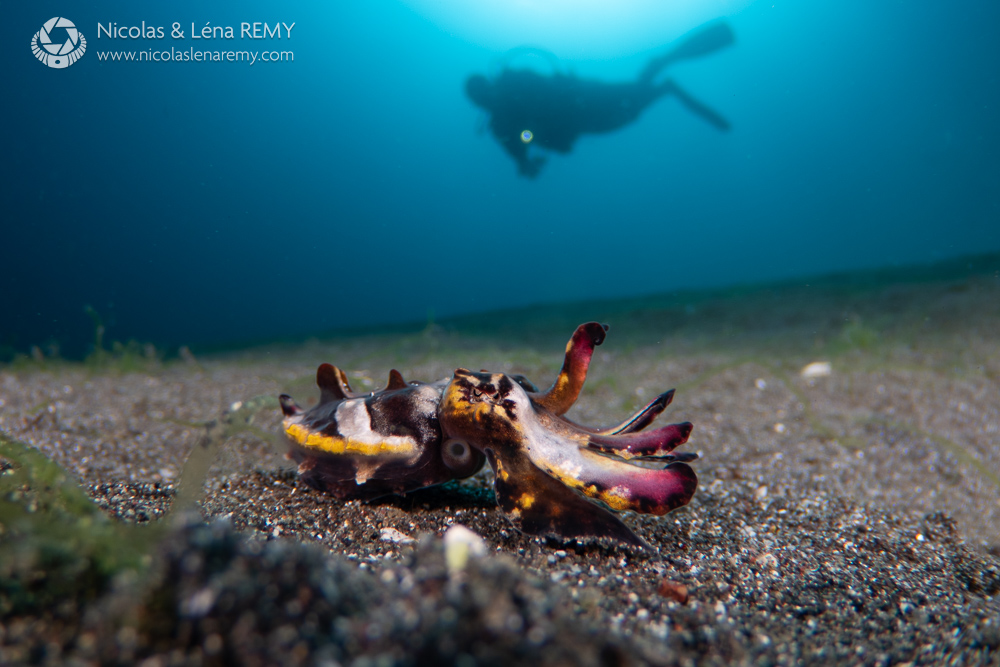
Left: Nikon D810, Nikon F 105mm, Nauticam EMWL 100°, 1/40, F/13, ISO 640.
Right: Nikon Z9, Modified Nikon Z 105mm, Nauticam EMWL 160°, 1/50, F/20, ISO 800.
On that note, the 160° front lens was my favorite optic to use with the angled relay, since name of the game was to include as much water background as possible in the frame. Check my EMWL review for a more detailed discussion about that lens and how it compares with the 100° optic.


Right: instead, the angled relay let me frame up and get more water than muck in the frame. The final touch was the torch of my dive guide Fandy, who is also a very talented model.
Nikon Z9, Modified Nikon Z 105mm, Nauticam EMWL 160°, 1/60, F/18, ISO 800.
Do you still need an external viewfinder?
It’s a question I asked myself when I first heard about the angled relay. I normally use an external 45° viewfinder, because it makes framing upwards easier, amongst other things. With the angled relay though, the housing is pointed down and looking through my external viewfinder wasn’t always as comfortable.
All-in-one, if the subject is on the sand and I want the front optic really flat on the ground, then I would sometimes switch to the rear LCD screen and frame my photo from a distance. Most of the time though, I preferred framing through the Nauticam 40° 0.8:1 viewfinder for extra stability (one hand on the housing, and the external viewfinder resting on my mask). This is one scenario where a straight external viewfinder would be the most comfortable option.
Optical quality
As I wrote in my detailed EMWL review, I found the optical quality to be excellent, especially when using the 160° front lens. The good news is: I didn’t notice any loss in sharpness nor color contrast when swapping the straight 150mm relay for the angled relay.

When the standard straight relay is better
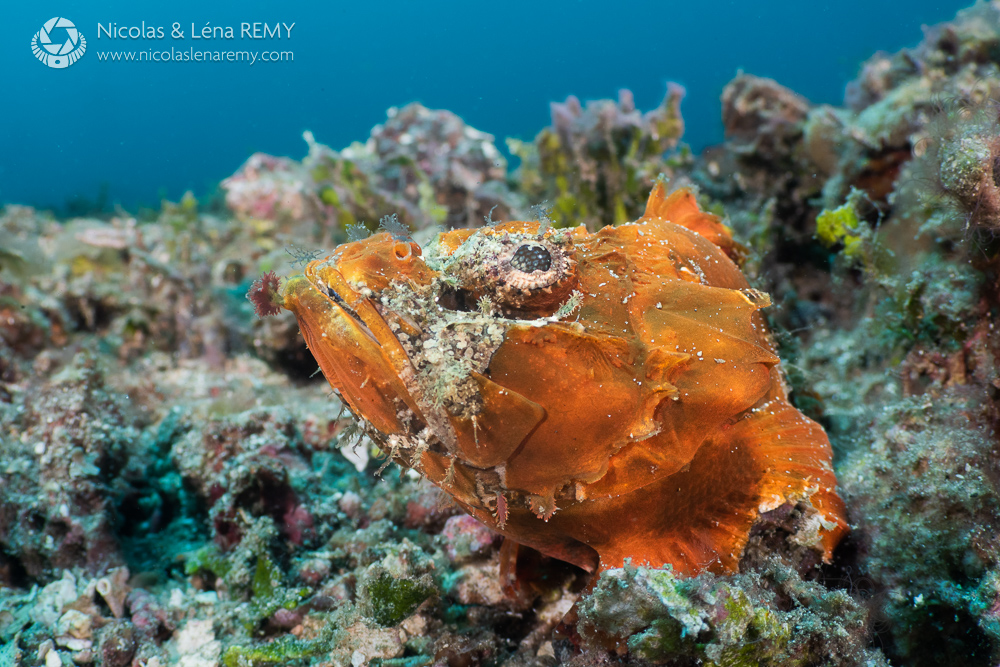
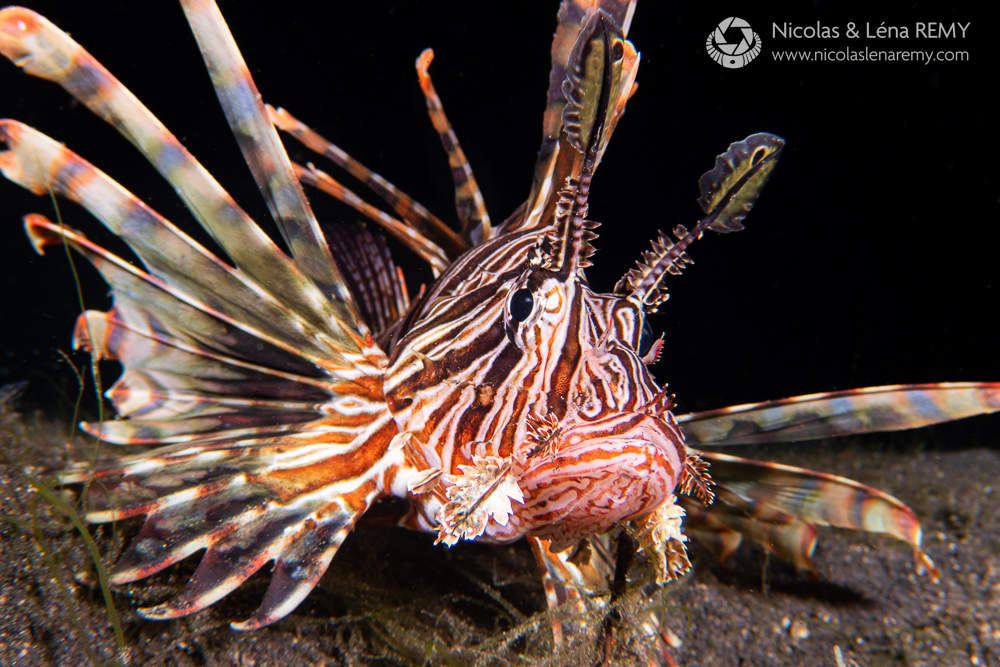
Think about all these good-looking subjects that you would have to pass on, because they are positioned too low? The angled relay lets you shoot them from below, possibly including the surface, a model, the sun, or all of the above in the background. Great.Now think about a frogfish that is ideally positioned to shoot with a normal EMWL setup, or even a traditional CFWA setup (fisheye/minidome). It is sitting above the seafloor so you have space to bring your housing close, and it is looking slightly up, enabling a strong eye contact, what a perfect photo opportunity! Well, if you are shooting the angled relay, that subject isn’t that productive anymore. Quite the contrary: unless you think the bottom jaw of said frogfish is great subject on its own, you’re going to have to wiggle in mid water, upside down, trying to achieve a pleasing composition.
Nikon Z9, Modified Nikon Z 105mm, Nauticam EMWL 160°, 1/200, F/20, ISO 500.
You get the idea: use the right tool for the right job. There will be subjects where the angled relay is unsuitable and you would be better-off with the straight relay. If your camera supports flipping the screen/EVF, then once solution is to take-off the angled relay when you encounter such a subject and flip the screen (the EMWL’s image is otherwise upside-down, without a relay lens).

The feature I missed
As explained in the wide-angle course, verticals tend to produce the most dramatic CFWA imagery. Indeed, you get more space to spread out visually-distinct foregrounds, middle-grounds an backgrounds, resulting in images with more “depth”. You can also include more water and sunlight in the photo. The angled relay is a fantastic CFWA accessory, because it makes it so easy to include the surface/model/sun in your shot… but it cannot be rotated: it is usable in landscape orientation only.
Wrap-up
The angled relay is the most exciting piece of underwater photography gear that I have tried in a while, well, since I started using the EMWL two years ago really. Nothing excites me more than a product that lets me create previously-impossible images, and this is exactly what this lens does. I can think of so many dive sites, subjects and scenarios where it would produce “never-seen-before” images…
However there is no doubt the angled relay is a specialist tool: it can only be used in landscape-orientation and it won’t suit all subjects, depending on how they are positioned.
Assuming you’ve already bought into the EMWL system, should you add this accessory to your arsenal?
Remember the fun you had when discovering the new ‘bugeye’ perspective offered by your shiny new EMWL? The angled viewfinder is an invitation to take it one step further, continuing that discovery of previously unseen perspectives. Whether or not this is worth the hefty price tag (USD 3,866/AUD 5,340, at time of writing), only you can decide, and I hope this review helped doing that 🙂

Nikon Z9, Modified Nikon Z 105mm, Nauticam EMWL 160°, 1/200, F/22, ISO 640.
About the author
Nicolas Remy (@nicolaslenaremy) is an Australia-based pro shooter and founder of online underwater photography club & school The Underwater Club. His images have been widely published in print and digital media, and have won over 35 international photo awards.
Nicolas would like to thank Nauticam for providing the angled relay lens used in this review.
Affiliates links and discounts
You can support The Underwater Club’s blog articles by purchasing your equipment via some of the above links. Our partner Mozaik Cameras offers a 3% discount on all equipment, more details on our Partners page.


Comments